
When leaves, dirt, and rain collect on top of your pool cover, they can weigh it down, cause damage, and even shorten its lifespan.
Installing a pool cover pump prevents water from building up and ensures that your cover stays clean and dry. With the right instructions, you can complete the installation yourself without needing special tools or help.
Before diving into the instructions, remember that there are several types of pumps for pool covers. The best ones can handle large amounts of water, and some come with automatic shut-off features, making your job even easier.
Key Points:
- Ensure your pump is compatible with your cover.
- Clean the cover before placing the pump.
- Position the pump on the lowest part of the cover.
- Use a hose to direct water away from your pool.
- Regularly check and maintain the pump.
Step 1: Gather Tools and Materials
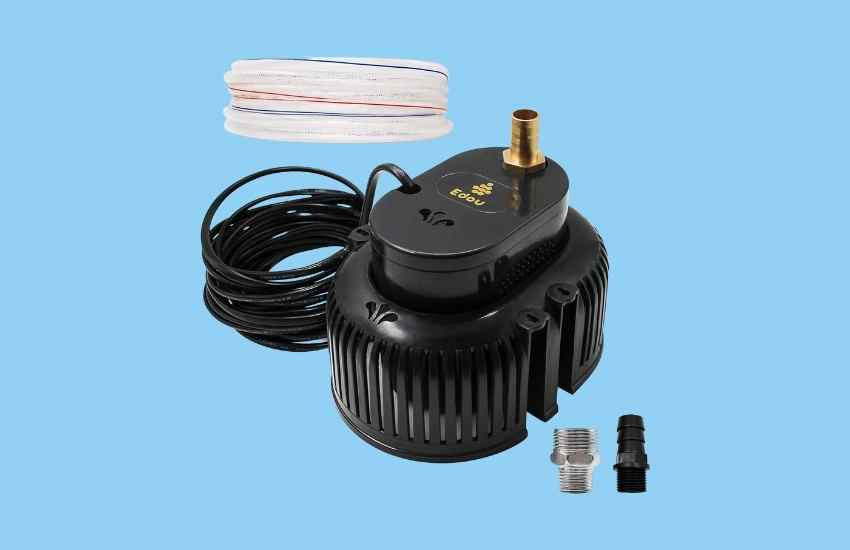
To start, make sure you have everything you need. The essentials include a pump, a garden hose, and an extension cord if necessary. Some pumps may need extra parts, like clamps or adaptors, so double-check the manufacturer’s instructions. You will also need a clean surface to place it on, as well as access to a nearby power source.
Always pick a model that works well with the cover on your pool. Not every pump fits all covers, so ensuring compatibility helps avoid frustration later. If you haven’t purchased one yet, the external source linked above can provide guidance on high-quality options for 2024.
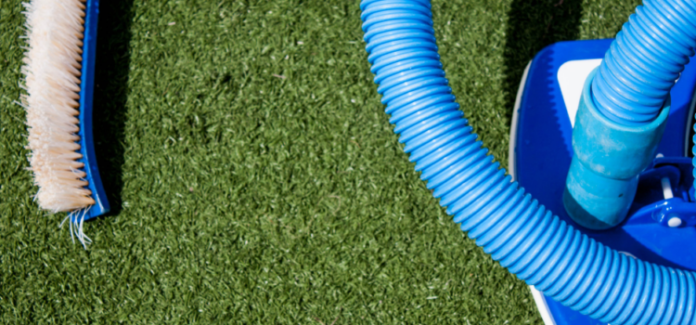
Step 2: Clean the Pool Cover
Dirt and debris on your cover can interfere with your pump’s efficiency. Start by removing leaves, branches, or other material that has built up. You can use a leaf blower, a soft brush, or even your hands, depending on the amount of debris.
Cleaning the cover gives the pump an even surface to rest on, which improves its performance. Any leftover dirt might block water flow, so take the time to clean the surface thoroughly.
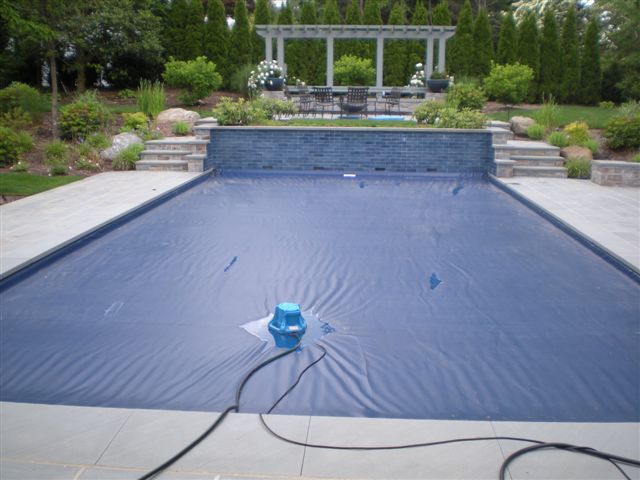
Step 3: Position the Pump
The next step is to find the right spot to place it.. Locate the lowest point on your cover where water tends to gather. This spot will allow the pump to work more efficiently, as water will naturally pool in that area. If you aren’t sure where the lowest spot is, look for sagging or uneven parts of the cover.
Once you find the right spot, place it directly on that area. Make sure it’s stable and secure before moving on to the next step.
Step 4: Attach the Hose
A garden hose is necessary to direct the water away from the cover. Attach one end of the hose to the pump and stretch the other end to a suitable drainage area. Keep the hose flat and untangled, as kinks or twists can disrupt water flow.
Choose a drainage area that won’t cause water to flow back toward the pool. Ideally, the area should be at least a few feet away from the pool to prevent any damage to the cover or pump.
Step 5: Connect the Pump to Power
Most pumps require electricity, so ensure you have access to an outdoor outlet. Plug the pump’s power cord into an outlet or use an extension cord if necessary. If you’re using an automatic pump, it will start working as soon as water reaches a certain level.
For manual pumps, you will need to turn it on yourself. Keep an eye on it as it starts removing water, making sure everything runs smoothly.
Step 6: Monitor Water Levels
While the pump is running, keep an eye on the water level. If the water starts to flow back onto the cover, adjust the position of the hose. It may take some time for the pump to remove all the water, depending on the size of your pool and the amount of water collected.
During heavy rains, you might need to check the pump more frequently to ensure it continues working properly.
Step 7: Turn Off the Pump and Store Properly
Once the water has been removed, turn off the pump and unplug it. If your model has an automatic shut-off, it will stop running when the water level gets too low. After unplugging, disconnect the hose and store both the pump and hose in a dry, safe place.
Storing your pump properly ensures it stays in good condition for future use. Keep it in a place where it won’t be exposed to harsh weather or accidental damage.
Step 8: Regular Maintenance
To keep your pump functioning properly, regular maintenance is key. Clean any dirt or debris that might get stuck in the pump, and check the hose for wear and tear. If your model has a filter, clean or replace it according to the manufacturer’s guidelines.
Regularly inspect the pump to ensure everything works as it should. Catching small problems early helps avoid costly repairs later.
Tips for Better Efficiency
Keep the pump in good condition by storing it properly and cleaning it after each use.
Use a hose that’s long enough to reach a proper drainage area.
Check for wear and tear on the pump’s parts, replacing them as necessary.
Conclusion
Installing a pool cover pump is a simple process that helps protect your pool cover and extend its lifespan. Following the outlined steps ensures that the water on top of your cover is properly removed, preventing unnecessary weight and potential damage.
Remember to clean the cover beforehand and monitor the pump as it runs to ensure everything goes smoothly. Store it in a safe, dry location to avoid damage, and be proactive about inspecting it before each use.
A well-maintained pump will last longer and perform more efficiently, saving you time and effort in the long run. By taking these steps, you can ensure that your pool cover remains protected and your pump functions effectively season after season.


