The process of configuring PHP settings on a Debian server is an essential step that must be completed in order to enhance the speed, security, and compatibility of your web applications. This step is required in order to achieve improved performance.
Regardless of whether you have rented a virtual private server (VPS) in the Netherlands or are utilizing a server from another provider, having the knowledge to modify PHP settings can have a significant impact on the success of your web projects. As we proceed through this tutorial, we will discuss the process of configuring PHP settings on Debian, drawing from the knowledge and experience of someone who has already accomplished this task.
The Importance of Configuring PHP Settings

PHP is an adaptable scripting language that is frequently utilized for the building of websites. It is possible to fine-tune its parameters in order to meet the requirements of a particular project. Listed below are some of the most essential reasons why it is important to configure PHP settings:
- Performance Optimization: By adjusting settings like memory limit and execution time, you can improve your application’s performance, ensuring it runs smoothly and efficiently.
- Security Enhancements: Configuring PHP settings can enhance your application’s security by enabling or disabling features, reducing attack vectors, and strengthening data protection.
- Compatibility: It is possible that certain PHP settings are necessary for the proper operation of certain programs. Using PHP to configure your application guarantees that it is compatible with the environment it is running in.
Now, let’s delve into the steps for configuring PHP settings on Debian.
Prerequisites

Before you start configuring PHP settings on your Debian server, ensure that you have the following prerequisites in place:
- Access to Your Debian Server It is required that you have secure shell (SSH) access to your server and administrative privileges.
- Operating System (OS) Debian: The operating system that is installed on the server that you are using is considered to be Debian. Because the instructions in this guide were designed specifically for Debian, it is possible that they will be slightly different when applied to other Linux distributions.
Step 1: Locate the PHP Configuration File
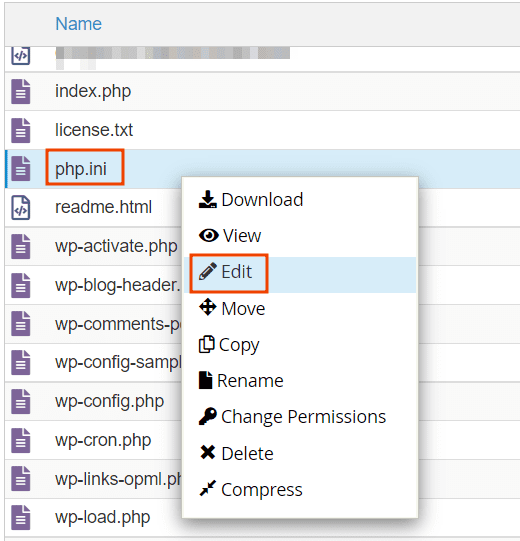
The PHP configuration file, known as php.ini, contains various settings that govern the behavior of PHP on your server. To locate this file, run the following command:
php -i | grep “Loaded Configuration File”
This command will display the path to your server’s php.ini file.
Step 2: Edit the php.ini File

Once you’ve identified the php.ini file, you can edit it to modify PHP settings. You can use any text editor to open the file. In this example, we’ll use the nano text editor:
sudo nano /path/to/your/php.ini
Replace /path/to/your/php.ini with the actual path obtained in Step 1.
Step 3: Adjust PHP Settings
Inside the php.ini file, you can modify various PHP settings. Here’s a list of common settings you may want to configure:
- Memory Limit: Adjust the amount of memory PHP can use. For example, to set a memory limit of 128MB, find and modify the line memory_limit as follows:
memory_limit = 128M
- Max Execution Time: Change the maximum execution time for PHP scripts. To set a limit of 60 seconds, modify the max_execution_time line:
max_execution_time = 60
- Upload and Post Sizes: Increase the maximum allowed size for file uploads and POST requests. To allow a 20MB file upload and a 20MB POST size, update the following lines:
upload_max_filesize = 20M
post_max_size = 20M
- Error Reporting: Configure error reporting settings for debugging purposes. To display all errors, warnings, and notices, update the error_reporting line:
error_reporting = E_ALL
- Security Features: Enable or disable specific PHP security features such as magic quotes or register globals. To disable register globals, set the following line to Off:
register_globals = Off
- Display Errors: To display PHP errors directly in the browser, set display_errors to On:
display_errors = On
- Date and Timezone: Configure the default timezone for PHP date and time functions. For example, to set the timezone to New York, update the following line:
date.timezone = America/New_York
Step 4: Save and Exit
After making the necessary changes, save the php.ini file and exit the text editor. In the nano text editor, you can save your changes by pressing Ctrl + O, then Enter, and leave the program by pressing Ctrl + X.
Step 5: Restart the Web Server

It will be necessary for you to restart your web server in order to put the updated PHP settings into effect. This may be accomplished in a different manner depending on the software that you use for your web server. Commands for a number of different web servers are included in the following list:
- Apache:
sudo systemctl restart apache2
- Nginx:
sudo systemctl restart nginx
Step 6: Verify the Configuration
To ensure that your PHP settings have been configured correctly, create a simple PHP file with the following content:
<?php
phpinfo();
?>
Access this file in your web browser (e.g., http://your-server-ip/phpinfo.php) and check if the settings you modified in the php.ini file are reflected in the PHP information page.
The process of configuring PHP settings on a Debian server is a necessary step that must be taken in order to improve the speed, security, and compatibility of your online applications. Understanding how to alter PHP settings can have a big impact on the success of your web projects, regardless of whether you have rented a Netherlands VPS or are using a server from another provider. In this guide, we’ll explore the process of configuring PHP settings on Debian, sharing the experience of someone who has already done so.
Take into consideration vsys.host if you are in need of hosting services or virtual private server settings. They provide an extensive selection of virtual private server configurations at very reasonable pricing, which makes it a trustworthy option for your hosting requirements.


